Have you ever wondered how to make butter from milk? Butter is an ancient food staple that can easily be prepared at home with the right tools. Making butter at home allows you to discover food preparation while saving money on store-bought versions. Get yourself 1 litre of full-fat milk cream daily and store it in the fridge.
The Benefits of Make Butter From Milk
Homemade butter can be made quickly and tastes much fresher than store bought varieties. All it requires is whipping cream and some sea salt. Plus, any flavorings like herbs or honey can add an extra special touch!. Homemade butter making can be an engaging family activity or an engaging conversation starter at dinner parties.
Better Nutrition
Butter has long been an integral part of life in many homes for generations, providing essential vitamins like A and Lauric Acid along with antioxidants. What’s more is it contains no preservatives or salt and is produced using just one ingredient – heavy cream!
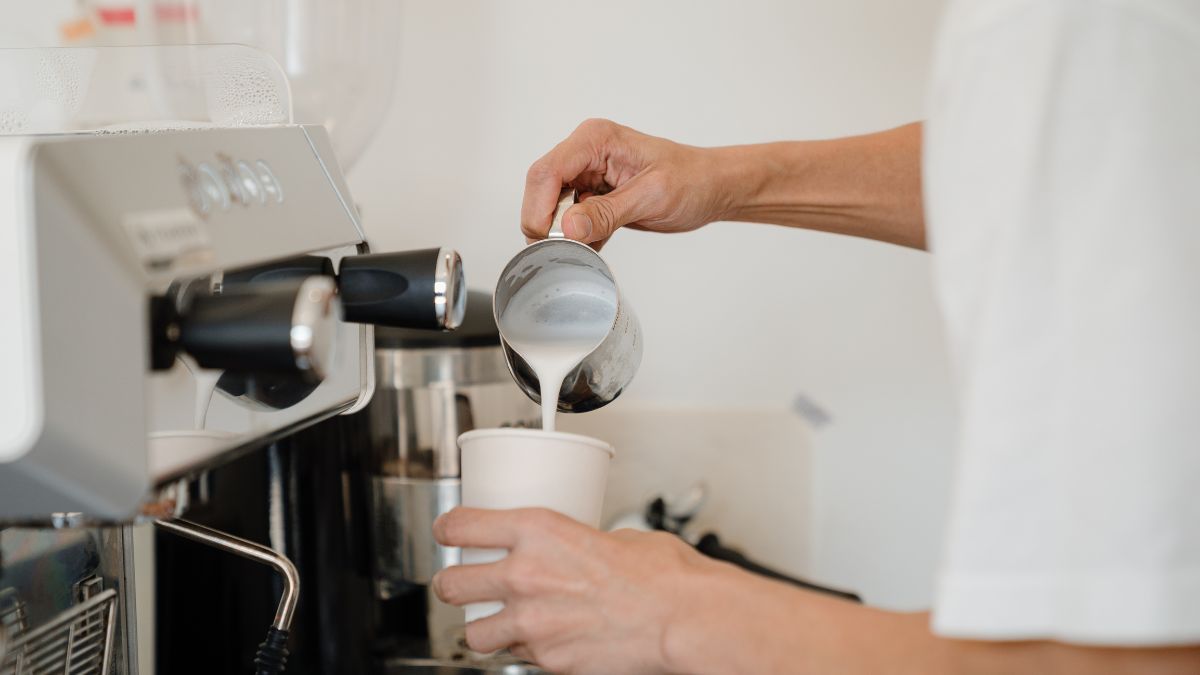
Milk left unattended can allow fat molecules to float to the top and, with continuous mixing or shaking of cream for long enough, eventually form butter clumps that eventually harden into butter. This process, known as churning, may seem simple enough but many rely on an electric churn instead to produce healthy homemade butter that contains no preservatives, salt or colors added during production.
Butter can add an irresistibly decadent taste to bagels, toast and waffles; and makes an ideal foundation for baked goods such as cakes and cookies. Though butter does contain saturated fats, when consumed in moderation it can be considered healthy option.
Butter contains minimal lactose and should be tolerated by those who are lactose intolerant, although this varies from person to person and it’s wise to consult your physician if you are having any difficulties digesting lactose. Homemade butter can often be cheaper than store-bought varieties and lasts much longer when rinsed in cold water after being placed in the fridge to remove any extra whey/buttermilk that has collected on its surface.
Lower Cholesterol
People who switch from butter to vegetable oils as part of a “heart healthy” lifestyle often miss its delicious, creamy texture and rich flavors. And while the American Heart Association advises limiting saturated fat to 5-6 percent of your total daily caloric intake (11-13 grams for two tablespoons of unsalted butter), homemade varieties actually tend to contain lower levels than commercially manufactured alternatives.
Making homemade butter can be an enjoyable, straightforward activity requiring only heavy cream. Simply whip the cream until its contents start separating into butterfat and buttermilk; in mere moments you’ll have fresh, delicious-tasting treat that can be enjoyed alone or used in recipes!
Homemade butter’s lower cholesterol levels are due in large part to its reduced processing. Commercially made butter often undergoes pasteurization and homogenization processes that remove beneficial enzymes while breaking apart fragile nutrients. Furthermore, its saturated fats have often been refined heavily which increases their oxidation potential resulting in higher oxidized levels and cholesterol counts.
Home-made butter, by contrast, is made with unrefined milk fat and contains more monounsaturated fatty acids that may help lower bad cholesterol levels in your bloodstream. Furthermore, it contains half the saturated fat of regular butter while offering more “good” cholesterol benefits.
Better for the Environment
Homemade butter can be quite easy and straightforward to produce at home, requiring just heavy cream, an agitator such as an old-fashioned butter churn, blender, electric mixer or hand beater or simply an ordinary mason jar – as long as there’s an effective means of stirring it! Making homemade butter with children can be both educational and engaging activity – perfect for teaching them traditional food preparation methods!
Homemade butter can also save money versus store-bought, since you can tailor its saltiness according to your individual preferences and adjust for blood pressure-raising effects from too much added sodium in store-bought versions.
Homemade butter offers another advantage over store-bought varieties: its ability to be created with organic or grass-fed milk if desired. Mother Earth News notes that grass-fed cows produce higher levels of fundamental unsaturated fats (healthy fats), carotene, vitamin A and E than grain-fed cows do when producing milk for butter production, according to Mother Earth News reports.
Homemade butter can also be better for the environment than store-bought versions as it’s less likely to develop bacteria and mold growth due to being made out of mostly fats with water molecules trapped within pockets of fat, rendering it virtually impenetrable by bacteria. Homemade varieties can also be pasteurized, which reduces bacteria counts further reducing its bacteria count significantly and making sure it lasts a year when stored correctly.
Better for Your Heart
Butter is an integral part of many homes, yet if you’re trying to cut calories or fat in an attempt to make heart-healthy dishes or follow a dairy-free diet, using peanut or almond butter in place of butter can add protein and fiber.
Nut butters, which are solid at room temperature, have the texture similar to butter when baking and can provide heart-healthy monounsaturated fats which help lower cholesterol. Another healthy option that works well as an alternative is coconut oil; you can find it both at grocery stores and natural food stores and can use it instead in many of your recipes just like butter.
Homemade butter can last several weeks in the refrigerator or six months in the freezer depending on whether it’s salted or unsalted, making it an easy addition to any pantry. Plus, homemade versions save money over store-bought versions, allowing you to customize flavors like salted roasted garlic butter! Plus, when making it yourself you have greater control over ingredients and their use – reducing harmful additives!.
The Process of Make Butter From Milk
Collect the cream
Butter has long been an indispensable kitchen ingredient, but did you know it once was considered dangerous food? In the 1950’s, butter was widely seen as an artery-clogging and cholesterol-raising saturated fat that contributed to heart disease, leading many people to opt for mass-produced butter made with hexane washed hydrogenated vegetable oils instead.
Making butter yourself can be easy and mess-free – all it requires is milk and some simple tools. Once common among families, many now rely on industrial butter-making machines instead to craft delicious homemade treats!
To collect cream, begin with fresh, non-homogenized milk (raw or pasteurized, but avoid homogenized). Put this milk in a bowl or jar and allow it to set for approximately 24 hours so the cream has time to rise to the surface. When thick layers have formed on top, gently dip your ladle into it; take care not to go too deep as you could end up scooping milk as well!
Start dipping and collecting cream until you have extracted approximately one cup from the milk. Pour it into an airtight jar for storage in the fridge; it will keep for approximately 10 days.
Heat the milk
Making homemade butter from milk is easy and produces delectable, rich butter that’s perfect for toast and sandwiches.
Making homemade butter requires high-fat milk; store-bought options cannot compare in terms of taste or quality. High-fat milk can usually be found at most grocery stores’ dairy sections or local farm markets; alternatively, try contacting a dairy farmer in your area who specializes in raw milk production or even seeking out someone with their own cow for help in order to source enough raw milk to make butter yourself.
Raw milk offers many natural vitamins and minerals beneficial to health, making homemade butter much simpler and cost-efficient than buying it pre-made from stores. You have control over whether to add salt when making butter at home; depending on its usage it could require anywhere between no salt at all or more depending on how it will be stored in the refrigerator for two to three weeks.
To make butter, you will need a glass jar or container and some heavy cream. A metal or plastic butter whisk may also come in handy; using a blender/mixer may speed up this process so you can do other things while your butter is making. While you could attempt making it by hand with just a whisk instead, this will likely take more time and effort.
Separate the cream from the milk
Cream is unquestionably the most nutritious component of dairy milk. Healthy ancestral societies revered hand-churned butter made from cream produced by cows grazing on lush spring grasses – not only is it rich in nutrients but it contains fat-soluble vitamins A and D as well as the rare MK-4 short-chain menaquinone of Vitamin K2.
Commercial butter production involves extracting small amounts of cream from whey – an by-product of cheese-making – using a large centrifuge.
Make an easy homemade butter using only a food processor or Mason jar and powdered milk, oil, and salt, if desired. This recipe yields approximately 12 tablespoons from 3/4 cups.
Once your milk has been sitting in the fridge for some time, a layer of cream should form at its surface. With a turkey baster or ladle, collect this cream daily and store it in an airtight container in the fridge.
This will help prevent spoilage since the natural souring process involved with making butter can be very delicate, with any infection from micro-organisms being enough to compromise it and ruin your end product. When beating at high speed, cream will gradually change into butter; once this appears curdled you must strain through either muslin or fine mesh strainer to collect its strained buttermilk (now called “buttermilk”) so it can be reused in various recipes such as creating homemade yogurt.
Churn the cream
By using high-quality raw milk and a mechanical butter churn (available from many local farm supply stores), it’s easy to make creamy and delectably salted butter at home for yourself and your family. When selecting a churn with an easily closed lid that keeps butter from spilling out, keeping track of it easier while keeping cream from dissolving into buttermilk is ensured.
Making butter is a straightforward process that works well with any type of milk; for optimal results, use raw cream. No special starter culture is required to produce this butter; rather, allow the cream to sit in a container for 24 hours prior to being ready to churn – temperatures between 62 and 63 degrees Fahrenheit is optimal for successful buttermaking.
Once the cream has set for several hours, you can remove its top layer by skimming. Focus on extracting only the thickest portion as this contains the most butterfat; pour remaining buttermilk into a separate container to use later for other recipes; butter will now appear curdled and should start to form chunks.
Add the buttermilk
Historically, people made butter from cream by-products by leaving it out on the counter for hours or even overnight, giving it time to ferment and develop its distinct tangy taste. Today however, thanks to modern technology and food safety regulations, this process can be completed much more rapidly.
To create cultured buttermilk at home, simply combine 1 tablespoon of lemon juice or white vinegar with the milk needed to fill a liquid measuring cup up to its 1-cup mark, stirring well to combine and leaving for 10 minutes or until curdles form in the milk. Whole milk provides optimal results here with its higher fat content delivering consistent results.
Once the buttermilk has had time to ferment, it’s time to drain it. While colanders work fine for this task, cheesecloth or muslin makes pressing out butter much simpler. Once all of the excess buttermilk has been eliminated from your recipe, rinse your butter off using cold ice water and store until further use.
Repeat this process as often as desired to create your own homemade butter. While it’s best to consume it immediately, any excess can be stored in an airtight container in the fridge – though bear in mind that homemade varieties won’t be as long-lived than store-bought options.
Mix the butter
Before refrigeration was commonplace, people found ways to extend the shelf life of milk through processes like making butter. Making butter involves shaking a container of cream until its fat particles clump together and separate from its liquid state, leaving behind both solid fat-based butter product as well as liquid buttermilk that could then be consumed or stored away as long-term food staples in ancient cultures.
To create your own butter, pour heavy cream into a mason jar or other glass container and shake until butter separates from buttermilk. This may take some time; at first the cream may seem to whip into whipped cream but don’t give up! Keep shaking until its “breaks”, revealing butterfat distinct from liquid buttermilk.
Once your butter has formed, you must strain off any leftover buttermilk from it. Add some ice water to a bowl and submerge your butter for washing off any trace of buttermilk from it – though this step is optional – but doing this helps ensure no traces remain within it.
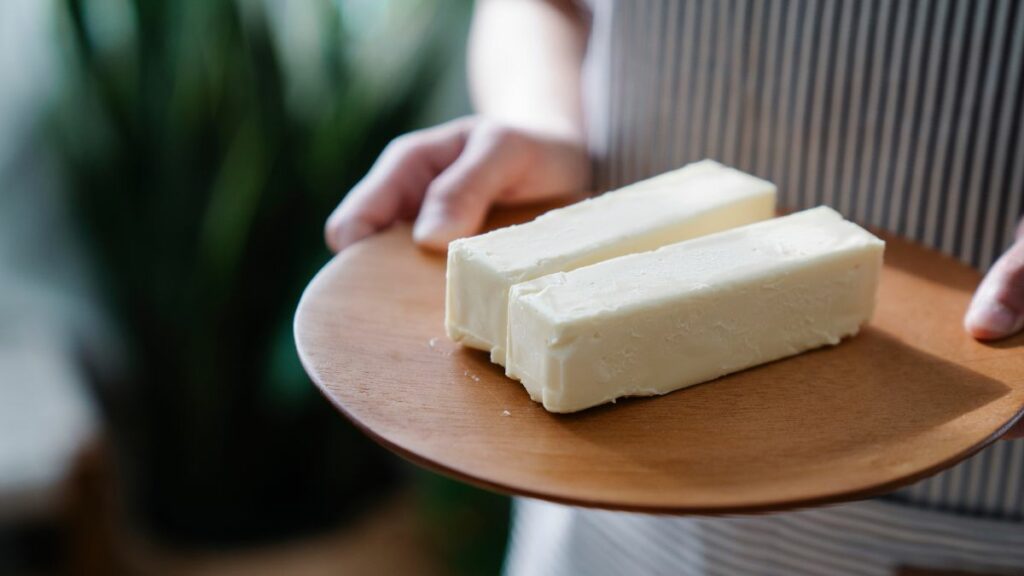
Once your butter has been strained, it’s ready for consumption! Homemade butter should last at room temperature for one week and up to three weeks when stored in the fridge – just remember that being exposed to direct sunlight taints it quickly; make sure it remains covered when not being used immediately.